Save
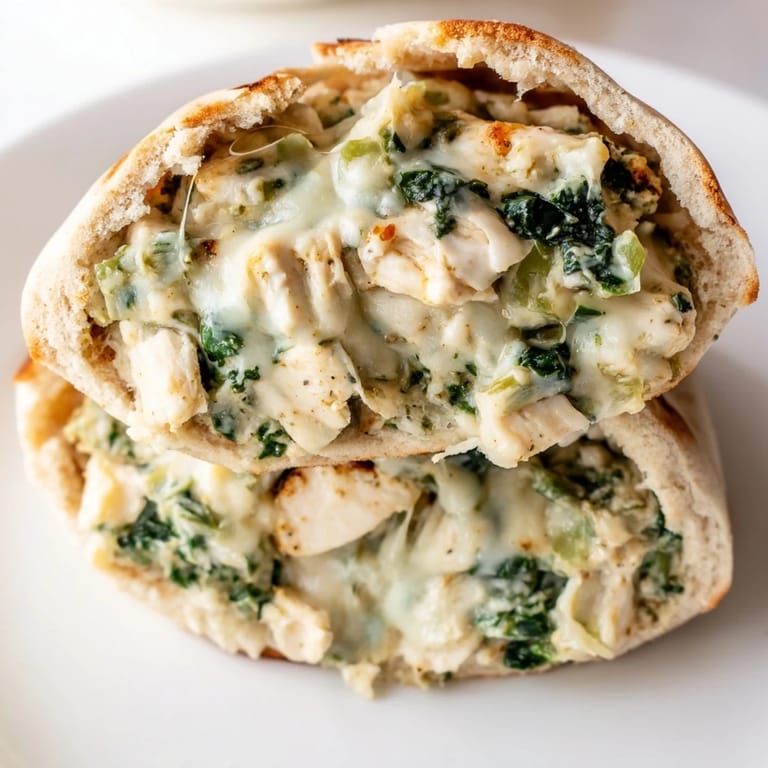
Save My roommate Sarah used to make spinach artichoke dip for every gathering, and I'd stand by the bowl pretending to help arrange crackers while actually eating half the dip myself. One afternoon, staring at leftover rotisserie chicken and that same dip craving, it hit me—why not stuff that glorious mixture inside something portable?
The first time I made these, my kitchen smelled like garlic and melted cheese within minutes. My boyfriend wandered in, lifted the oven lid, and asked if wed accidentally ordered takeout while I wasnt looking.
Ingredients
- 2 cups cooked chicken breast: Rotisserie chicken works perfectly here and saves so much time on busy weeknights
- 1 cup canned artichoke hearts: Drain them well and chop into small pieces so they distribute evenly throughout the filling
- 1 cup fresh spinach: Chop it finely so it wilts into the mixture rather than creating bulky pockets
- 1/2 cup Greek yogurt: Adds tanginess and creaminess while keeping things lighter than sour cream would
- 1/4 cup light mayonnaise: This binds everything together without overpowering the other flavors
- 1/2 cup shredded mozzarella cheese: Creates those irresistible cheese pulls when you bite into the warm pita
- 1/4 cup grated Parmesan cheese: Brings a salty, nutty depth that makes the filling taste restaurant quality
- 1 clove garlic, minced: Fresh garlic makes all the difference—jarred garlic just doesnt have the same punch here
- 1/2 teaspoon onion powder: Rounds out the savory notes without adding any texture or crunch
- 1/2 teaspoon dried oregano: Gives it that classic Mediterranean flavor profile everyone loves
- 1/4 teaspoon crushed red pepper flakes: Optional, but adds just enough warmth to make things interesting
- Salt and black pepper: Taste the filling before stuffing—artichokes and Parmesan are already salty
- 4 large pita breads: Whole wheat holds up better during baking, but regular works beautifully too
- Fresh parsley and lemon wedges: These brighten up all the rich, creamy flavors
Tired of Takeout? 🥡
Get 10 meals you can make faster than delivery arrives. Seriously.
One email. No spam. Unsubscribe anytime.
Instructions
- Preheat your oven:
- Set it to 375°F so its ready to go as soon as you finish stuffing the pitas
- Mix the filling:
- Combine everything except the pitas in a large bowl until its fully incorporated and looks like a creamy dip
- Prep the pitas:
- Cut each pita in half to create pockets, being careful not to tear through the bottom edge
- Stuff generously:
- Use a spoon to fill each pita half, pressing the mixture in gently to maximize the filling capacity
- Arrange for baking:
- Place the stuffed pitas on a parchment lined baking sheet, cut side facing up
- Bake until golden:
- Let them cook for 15 to 20 minutes until the cheese is melted and bubbly and the pita edges are slightly crisp
- Finish with flair:
- Sprinkle with fresh parsley and serve immediately while theyre still warm and gooey
 Save
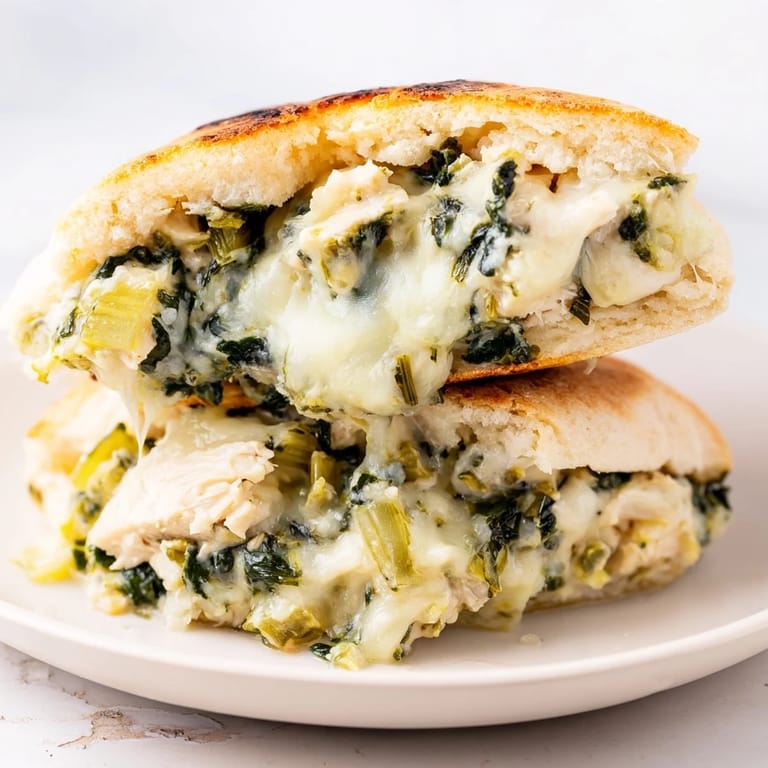
Save These have become my go to when friends drop by unexpectedly. Last week, my neighbor texted asking what smelled so good, and next thing I knew, we were having an impromptu dinner party on my back porch.
Make Ahead Magic
Ive learned through trial and error that the filling actually tastes better after sitting overnight in the fridge. The garlic mellows out, the spinach absorbs all those creamy flavors, and you can just stuff and bake when youre ready to eat.
Freezing For Later
After one too many whats for dinner moments, I started stuffing extra pitas and freezing them uncooked. Wrap each one individually in foil, then bake straight from frozen at 375°F for about 25 minutes.
Serving Suggestions
A crisp arugula salad with lemon vinaigrette cuts through the richness beautifully, and roasted vegetables on the side make this feel like a complete meal. Sometimes I serve extra warmed marinara for dipping because everything tastes better dipped in sauce.
- Pair with a chilled white wine like Pinot Grigio
- Add a side of roasted asparagus or zucchini
- Keep extra napkins handy—these can get gloriously messy
 Save
Save Hope these become a regular rotation in your kitchen too. Theres something so satisfying about turning dip ingredients into a real meal.
Recipe FAQ
- → Can I prepare the filling ahead of time?
Yes, mix the filling in advance and store it in an airtight container in the refrigerator for up to 2 days. Stuff the pitas and bake when ready to serve.
- → What's the best way to warm leftover stuffed pitas?
Wrap leftovers in foil and reheat in a 350°F oven for 10-12 minutes until warmed through. Avoid microwaving to prevent the pita from becoming rubbery.
- → Can I use frozen spinach instead of fresh?
Absolutely. Use 1/2 cup thawed frozen spinach and squeeze out excess moisture before adding to the mixture. This prevents a watery filling.
- → How do I make this vegetarian?
Replace the chicken with roasted chickpeas or crumbled tofu. You can also add sautéed mushrooms for a heartier, meatier texture.
- → What are good side dishes to serve with this?
A crisp Mediterranean salad with olive oil and vinaigrette, roasted vegetables, or tzatziki dip complement the pitas beautifully. Fresh fruit adds a refreshing balance.
- → Can I freeze stuffed pitas before baking?
Yes, freeze them on a baking sheet for 2 hours, then transfer to freezer bags for up to 3 months. Bake from frozen, adding 5-10 minutes to the cooking time.