 Save
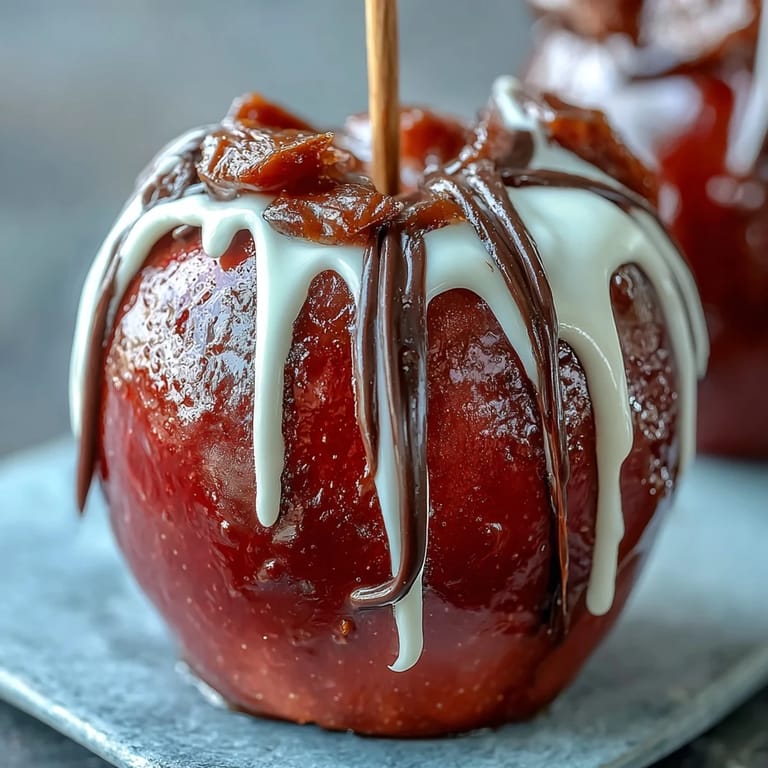
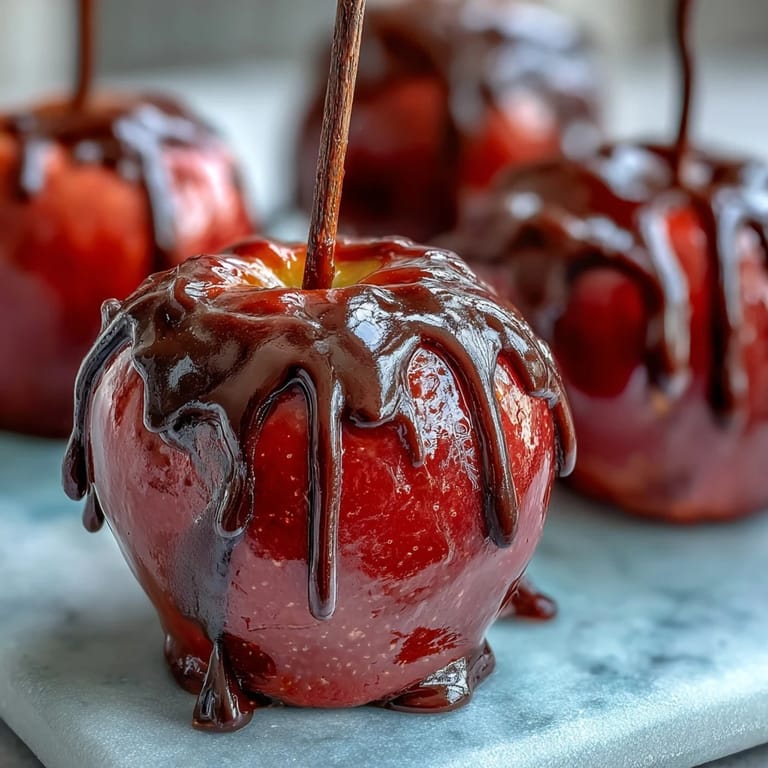
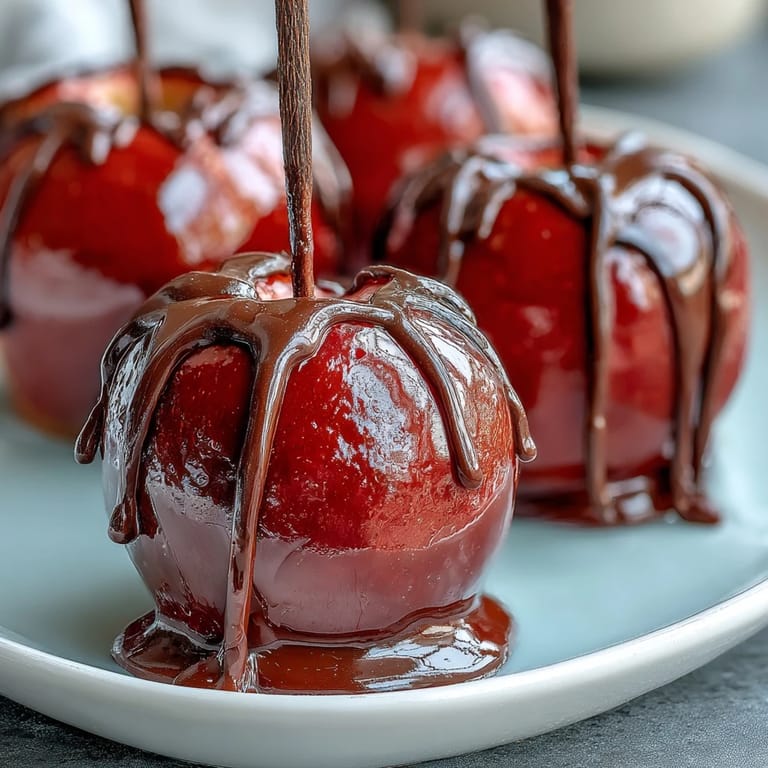
Save There's something about the smell of caramelizing sugar that pulls me back to county fairs and carnival rides, except now I'm standing in my own kitchen with a candy thermometer and eight apples waiting their turn. My neighbor stopped by one autumn afternoon while I was elbow-deep in this project, and the look of wonder on her face when she bit through that glossy red shell made me realize why these have stayed popular for generations. The tart Granny Smith inside cuts through the sweetness perfectly, and that white chocolate drizzle on top feels like finishing a painting. It's the kind of dessert that tastes nostalgic but still feels special enough to make fresh.
I made these for a Halloween party a few years back, and watching kids' faces light up when they realized the red coating was candy and not some trick was absolutely worth the minor burns I got on my fingertips. One kid asked if they were "the fancy kind," and honestly, that question stuck with me because they really are special without being pretentious. That night turned into half the party standing around my kitchen counter asking how I made them, which meant I got to explain the whole hard-crack stage situation multiple times but didn't mind one bit.
Ingredients
- Granny Smith or Gala apples (8 small to medium): Granny Smiths give you that crucial tartness that keeps these from tasting like pure sugar, but Galas work beautifully too if you prefer something sweeter. Make sure they're genuinely firm and completely dry before you start, or the candy won't stick properly.
- Wooden sticks (8): Craft sticks or popsicle sticks work equally well, and pushing them in firmly matters more than you'd think. I learned this the hard way when one rotated halfway through dipping.
- Granulated sugar (2 cups): This is your foundation, so don't try to shortcut with anything else.
- Light corn syrup (1/2 cup): This prevents crystallization and keeps your coating smooth and glossy instead of grainy.
- Water (3/4 cup): You need this to dissolve the sugar and create the right consistency for coating.
- Red gel or liquid food coloring (1/2 tsp): Gel coloring gives you a deeper, more vibrant red without thinning the mixture like liquid food coloring can.
- Cream of tartar (1/8 tsp, optional): This is my secret weapon for smoothness, though it's not strictly necessary.
- White chocolate (3 oz, chopped or chips): The quality matters here because cheap white chocolate tastes waxy. I've started looking for brands that use real cocoa butter.
- Coconut oil or vegetable oil (1 tsp, optional): This loosens the white chocolate just enough to drizzle smoothly without looking too thin.
Tired of Takeout? 🥡
Get 10 meals you can make faster than delivery arrives. Seriously.
One email. No spam. Unsubscribe anytime.
Instructions
- Get your workspace ready:
- Line a baking sheet with parchment paper and give it a light grease so the apples don't stick. Push your wooden sticks firmly into the stem end of each apple, wiggling slightly as you go to make sure they're secure enough to handle the weight of hot candy.
- Combine your candy ingredients:
- In a heavy-bottomed saucepan, gently stir together sugar, corn syrup, water, and cream of tartar if you're using it. The heavy bottom matters because it distributes heat evenly and prevents hot spots that can burn your candy.
- Heat without stirring:
- Clip your candy thermometer to the side of the pan and set it over medium heat. Once it starts boiling, stop stirring completely and just watch it climb toward 250°F. This is when you add your food coloring by swirling the pan gently.
- Reach hard crack stage:
- Keep that temperature climbing steadily to 300°F, which is where the magic happens. The moment it hits 300°F, pull it off the heat immediately because it can burn quickly if you're not watching.
- Dip with intention:
- Working fast but carefully, tilt the pan and dip each apple at an angle, rotating it to coat evenly. Let the excess drip off for just a second, then place it on your parchment paper and resist the urge to touch it while it sets.
- Prepare your white chocolate:
- Chop your white chocolate and put it in a microwave-safe bowl with the optional coconut oil. Microwave in 20-second bursts and stir between each one so it melts smoothly without getting grainy.
- Add the finishing touch:
- Once the red candy has completely hardened, use a spoon or piping bag to drizzle white chocolate across the apples in whatever pattern feels right to you. Let it set for about 10 minutes before anyone bites into them.
 Save
Save There's a moment when you pull a finished candy apple from the parchment paper and the red coating catches the light, and suddenly it stops being just dessert and becomes something people want to photograph and show their friends. That's when I know the effort was worth it, especially because the taste backs up that beautiful exterior.
Why Temperature Really Is Everything
I used to think candy making was more magic than science, but the hard-crack stage changed my mind completely. At 300°F, the sugar mixture transforms into something that hardens into a shell instead of staying sticky or chewy, and even 5 degrees in either direction changes the texture noticeably. The first time I didn't use a thermometer and went by color alone, I ended up with apples that stuck to your teeth, which taught me respect for precision in a way that was both memorable and slightly embarrassing.
Choosing Your Apples Wisely
The apple you choose sets the entire tone for the eating experience, and I've learned this through several batches. Granny Smiths deliver that sharp tartness that wakes up your taste buds and keeps the candy from feeling one-dimensional, while Galas give you something sweeter and juicier if your crowd prefers that route. Either way, make sure they're actually fresh and firm, because a mealy apple inside a beautiful red shell is a disappointing surprise nobody wants.
Making Them Your Own
Once you've nailed the basic technique, these become a canvas for whatever sounds good to you. I've rolled freshly dipped apples in crushed nuts, sprinkles, even crushed candy canes around the holidays, and each version gets its own loyal fans. The timing is crucial though, because you need to add toppings right after dipping while the coating is still sticky enough to hold them.
- Chopped pistachios give you a sophisticated salty-sweet combination that adults especially appreciate.
- Crushed candy canes in December feel seasonal without being over the top about it.
- A simple coating of sprinkles works just fine if you're keeping things classic and colorful.
 Save
Save Making candy apples feels like celebrating something, whether you're doing it for a specific occasion or just because a Tuesday afternoon deserves something special. Once you've made your first batch, you'll understand why they've been around for so long.
Recipe FAQ
- → What type of apples work best for candied apples?
Firm and tart apples like Granny Smith or Gala hold up well, providing a crisp texture that balances the sweet coating.
- → How can I prevent the candy coating from melting or sticking?
Ensure apples are completely dry before dipping. Let the candy set at room temperature on a greased or parchment-lined surface.
- → Why is the candy cooked to the hard crack stage?
Cooking to around 300°F creates a firm, brittle candy shell that cracks nicely when bitten.
- → Can I customize the coating colors or flavors?
Yes, you can use different food colorings or add subtle extracts like cinnamon or vanilla to the syrup for variety.
- → How is the white chocolate drizzle prepared?
White chocolate is gently melted with a bit of coconut or vegetable oil for a smooth consistency, then drizzled over cooled candy apples.