 Save
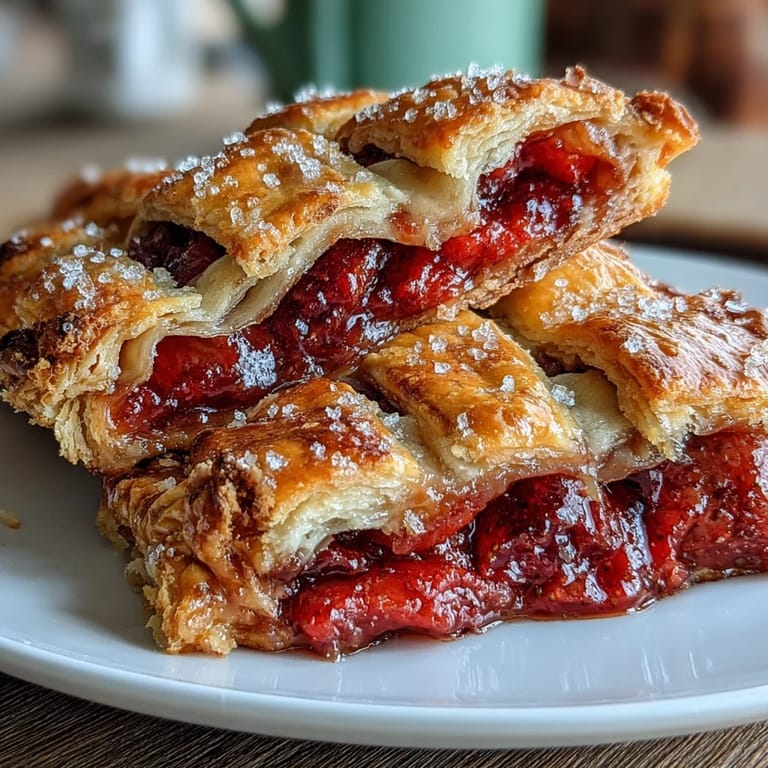
Save There's something about assembling hand pies that makes you feel like you're preparing for an adventure. I stumbled onto this recipe one June morning when a friend mentioned she'd packed homemade pies for a riverside picnic, and I couldn't stop thinking about how clever that was—dessert you could eat with your hands, no plate required. The lattice tops became my obsession; watching the strips weave together feels oddly meditative, like a small edible puzzle that actually tastes incredible.
I made these for a potluck last summer and watched them disappear within minutes, which was both flattering and slightly devastating since I'd only brought eight. My neighbor came back asking if I'd used store-bought dough, and when I said I'd made it from scratch, her eyes lit up in a way that made the extra effort feel completely worth it.
Ingredients
- All-purpose flour: This is your foundation, so measure by weight if you have a scale—it makes a real difference in texture and prevents a dense, tough crust.
- Cold unsalted butter: The cold matters more than you'd think; it creates those tiny pockets that steam up and make the crust flaky and golden.
- Ice water: Add it gradually and stop mixing the moment the dough comes together—overworking it turns your crust tough and chewy instead of tender.
- Fresh strawberries: Use ripe ones that smell fragrant; underripe berries won't release their flavor or juice properly into the filling.
- Cornstarch: This thickens the filling just enough so it won't leak out during baking and make your crust soggy.
- Lemon juice and vanilla: These seem small, but they brighten the strawberry flavor and add a subtle depth that makes people ask what your secret ingredient is.
Tired of Takeout? 🥡
Get 10 meals you can make faster than delivery arrives. Seriously.
One email. No spam. Unsubscribe anytime.
Instructions
- Mixing the dough:
- Whisk together flour, sugar, and salt, then add your cold butter pieces and work them in with a pastry blender or fork until everything looks like coarse breadcrumbs with some pea-sized butter chunks still visible. Add ice water one tablespoon at a time, stirring gently until the dough just barely holds together when you squeeze it—this is the moment to stop, even if it feels slightly shaggy.
- Chilling the dough:
- Divide in half, shape each into a disk, wrap tightly in plastic, and refrigerate for at least an hour, or up to overnight. Cold dough is forgiving dough, and the longer rest helps gluten relax so your hand pies won't shrink during baking.
- Making the filling:
- Toss your diced strawberries with sugar, cornstarch, lemon juice, vanilla, and salt in a bowl, then let them sit for about 10 minutes while they release their juices and the flavors get to know each other. The mixture should look jammy and glossy by the time you're ready to fill.
- Rolling and cutting:
- On a lightly floured surface, roll one dough disk to about 1/8 inch thickness and cut out 8 shapes—rectangles work great for hand pies, or circles if you prefer. Place them on a parchment-lined baking sheet and spoon 2 to 3 tablespoons of filling into the center of each, leaving a border so the dough can seal properly.
- Creating the lattice tops:
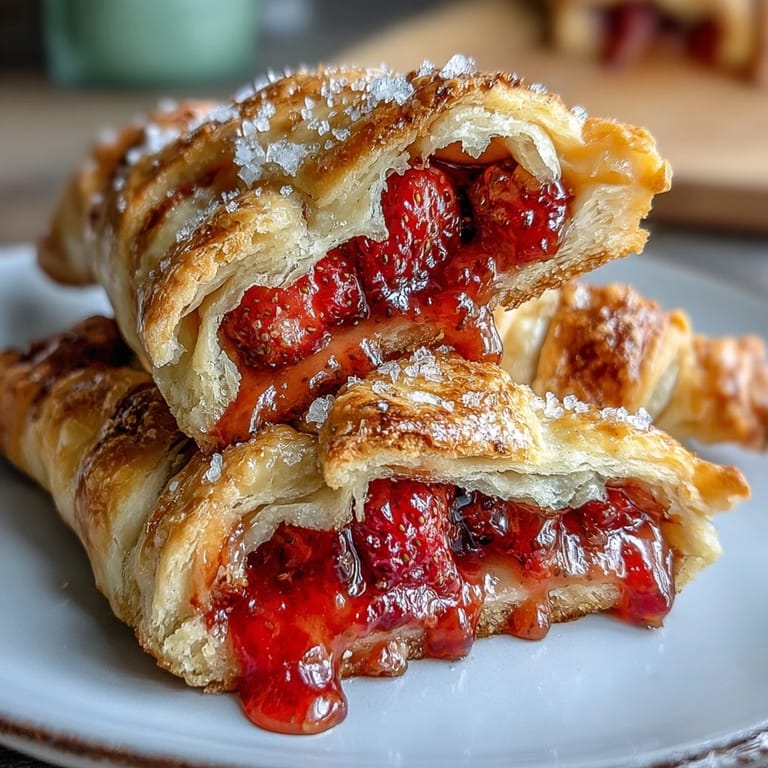
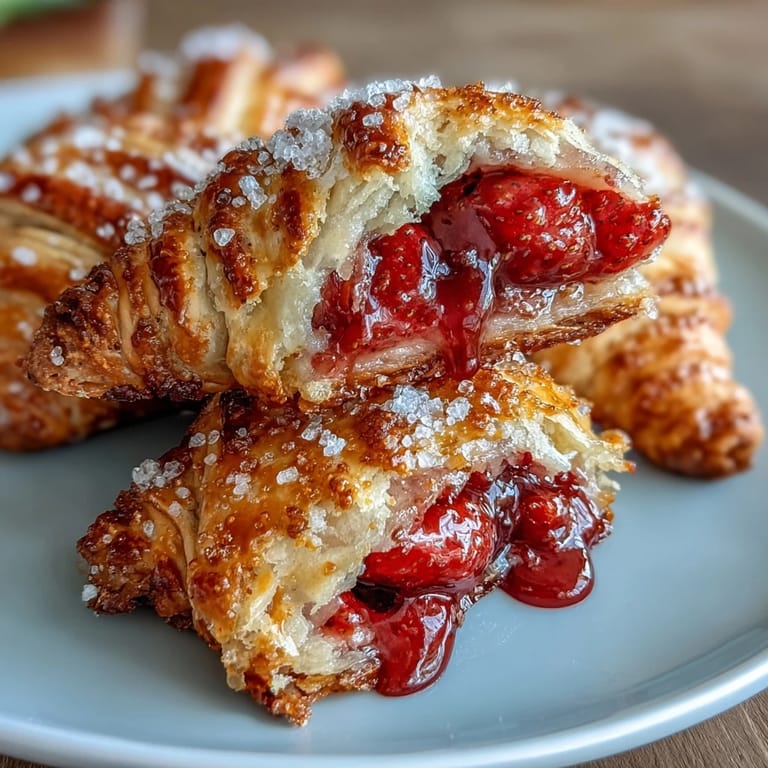
- Roll out your second dough disk and cut matching shapes, then carefully slice each into 6 thin strips using a knife or pastry wheel. Weave them into a lattice pattern over each filled pie—it's easier than it sounds, and even if it's imperfect, it looks beautiful and lets the ruby-red filling peek through.
- Sealing and finishing:
- Press the lattice edges down to seal them to the bottom crust, crimp the border with a fork for a rustic look, brush everything with beaten egg, and sprinkle coarse sugar over the top. The egg wash turns everything golden, and the sugar adds a delicate crunch.
- Baking:
- Bake at 400°F for 22 to 25 minutes until the crust is deep golden and you can see the filling bubbling gently around the edges. Let them cool on a wire rack for at least 15 minutes before you pick one up, or the filling will burn your mouth—trust me on this one.
 Save
Save These pies became something special the day my partner and I sat on a blanket at the botanical garden and bit into one while watching clouds move across the sky. It wasn't fancy or complicated, but somehow that warm, flaky crust and the burst of bright strawberry felt like the whole reason summer exists.
Keeping Your Crust Golden and Flaky
The secret to a crust that shatters gently when you bite into it lives in three decisions: using cold butter, not overworking your dough, and giving it proper rest time in the fridge. I learned this the hard way after making rubbery pies for years, thinking more mixing meant better dough—it's actually the opposite. The butter needs to stay in distinct little pieces so that when they melt during baking, they create steam pockets that puff up the layers.
Strawberry Filling Variations
While pure strawberry is wonderful, I've experimented with swapping in half blueberries or raspberries for a more complex flavor, and it works beautifully without throwing off the texture. The tartness of raspberries especially complements the buttery crust, and mixed berries feel less one-note. You can also add a tiny pinch of cardamom or a few fresh basil leaves to the filling if you're feeling adventurous—it sounds odd but tastes like a garden in the best way.
Timing and Make-Ahead Tips
If you're making these for an event, prepare the dough a day ahead and keep it in the fridge, then make the filling that morning so the strawberries stay fresh and bright. You can even assemble the pies a few hours before baking and leave them in the fridge uncovered, which actually helps them bake more evenly since they won't experience as much temperature shock.
- Store-bought pie dough is a legitimate shortcut if you're short on time and no one needs to know.
- These keep well in an airtight container for up to three days, though they're honestly best eaten the day they're made while the crust is still crispy.
- They freeze beautifully before baking, so you can assemble them weeks ahead and bake straight from frozen, just adding a few extra minutes to the baking time.
 Save
Save These hand pies are proof that sometimes the most memorable desserts aren't complicated—they're just made with a little care and shared with people who matter. Bake them when you want summer to last a little longer.
Recipe FAQ
- → Can I use frozen strawberries instead of fresh?
Frozen strawberries can be used, but thaw and drain excess liquid before mixing to avoid soggy filling.
- → How do I achieve a flaky crust?
Keep butter cold and handle the dough minimally to maintain small butter pockets, which create flakiness during baking.
- → What is the purpose of cornstarch in the filling?
Cornstarch thickens the strawberry juices as the pies bake, preventing a runny filling.
- → Can I make the dough ahead of time?
Yes, refrigerate the dough wrapped in plastic for up to 2 days or freeze for longer storage before assembling.
- → How should the lattice top be prepared?
Cut dough strips evenly and weave them gently over the filling to create a classic lattice pattern before baking.
- → Are there alternative berries to use in the filling?
Yes, blueberries or raspberries can replace half or all strawberries for mixed berry variation.